Origin
Recently, due to a company project, I revisited Machine Learning—more specifically, deep learning. I started learning from PyTorch, moved on to selecting and training a model, and then ported it to iOS to create a simple demo. Throughout this process, I went through many tutorials and noticed a few issues:
- For an average programmer, the field of ML is vast and overwhelming. If you’re not careful, you can get stuck in one aspect and struggle to get started. However, without some basic understanding—especially when it comes to practical tasks like modifying or training a model—it’s hard to know where to begin.
- Some ML tutorials are overly focused on mathematical formulas. While that’s not a bad thing, for someone like me with no prior ML knowledge, they’re difficult to digest.
- When applying models to the iOS platform, even Apple’s official demo examples use Storyboard-based UI code instead of SwiftUI. This isn’t beginner-friendly for someone like me, as SwiftUI is simpler and more convenient for learning and maintenance. Since I’m a newbie, I’m not great at building fancy apps with UIKit. Please don’t argue with me about SwiftUI’s performance!
Background Introduction
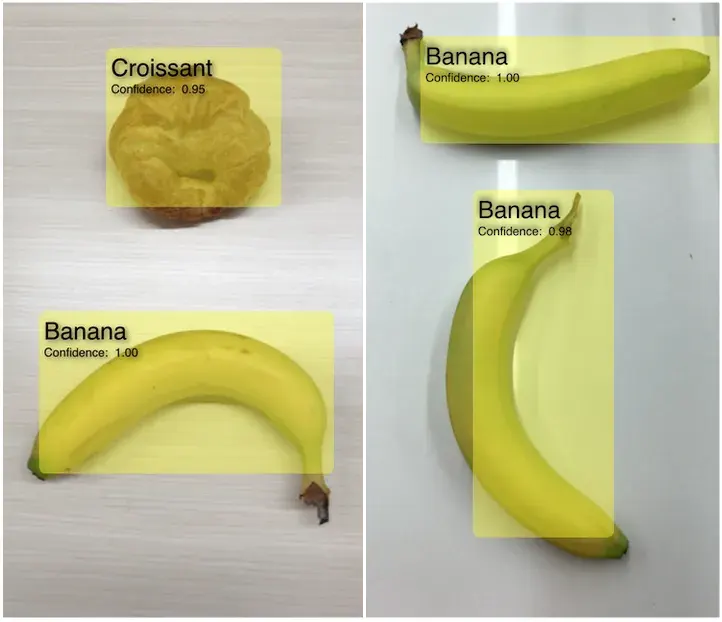
This series will use YOLO, an object detection model, as an example. YOLO’s primary function is object detection—it identifies objects in an image (e.g., apples, bananas, people) and marks them with bounding boxes. The effect looks something like this:
Apple’s official site provides YOLOv3, a compact and practical model. There are also YOLOv4, YOLOv5, YOLOv7, YOLOv8, and even YOLOv9. Hilariously, one guy named his project YOLO9000, outdoing version-number fanatics like Node.js, Chrome, and Firefox.
On a side note, YOLO underwent a major shift starting with v5. Earlier versions were written in C, but from v5 onward, it switched to Python, adding many features and greatly improving usability. The project also split from its original repository. This sparked a lot of debate when people compared it to earlier versions—check out this post for an interesting read.
Anyway, this article will ultimately use a custom dataset to train an ML model that identifies furniture types. I’ll sprinkle ML-related details throughout without diving too deep, so don’t worry too much!
Data Preparation
Data Download
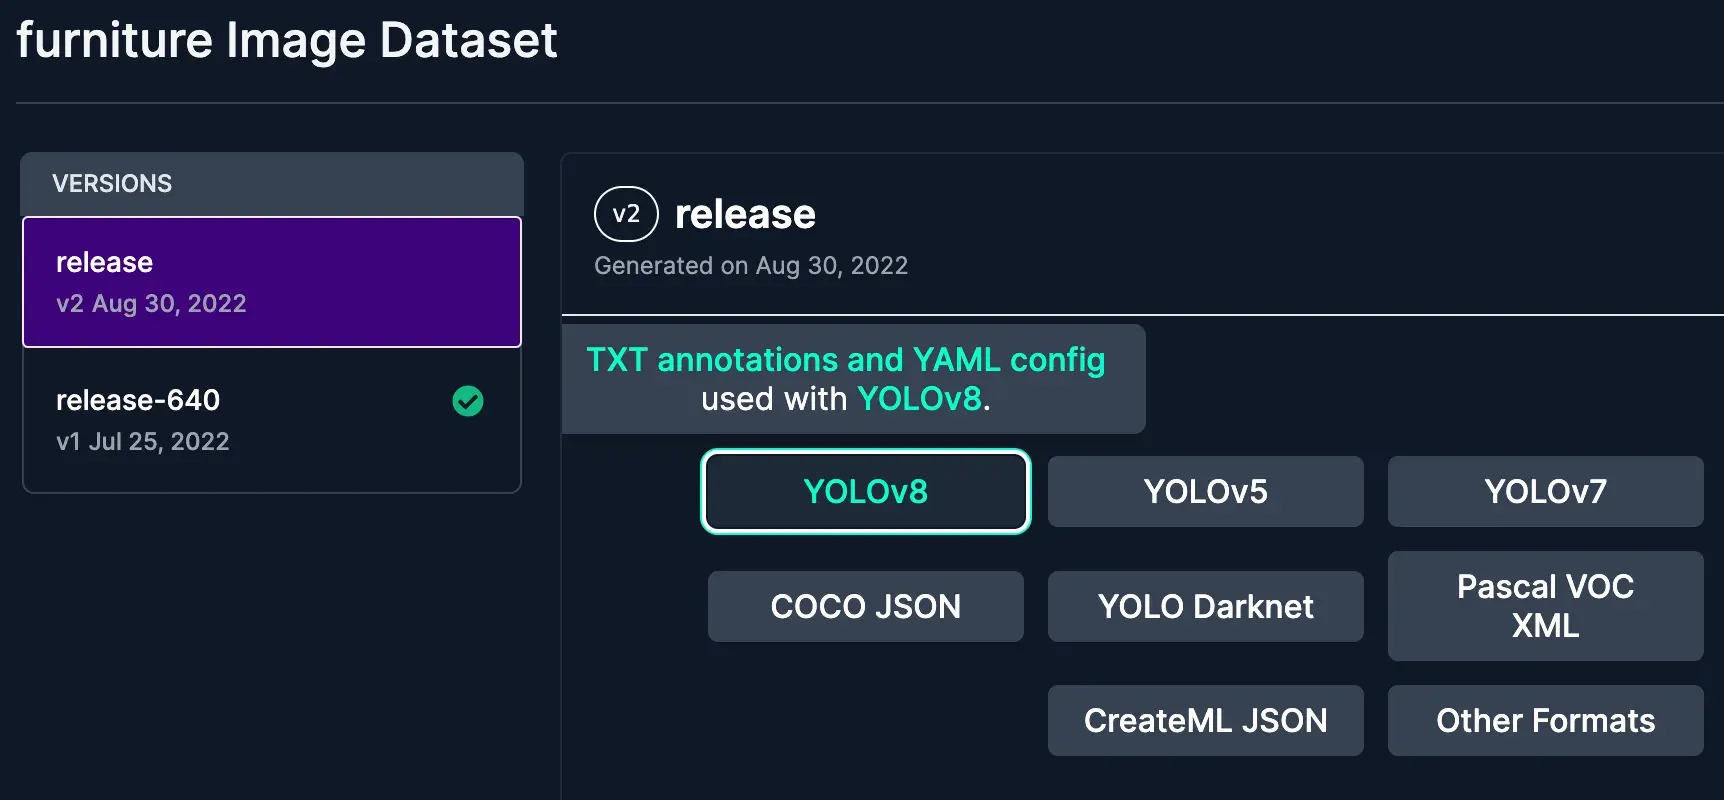
Roboflow offers public datasets for training or academic research, available here. For this project, we’ll use the pre-annotated furniture dataset. Click the button to download it, making sure to select the YOLOv8 format zip file.
A quick note about Roboflow: you can upload unannotated images, manually label them on their platform, and export the dataset in a standard format for model training. It’s a great experience and free to use. Check out the Preparing a custom dataset for YOLOv8 section here for the workflow.
Data Explanation
After unzipping the file, let’s take a look at the folder contents:
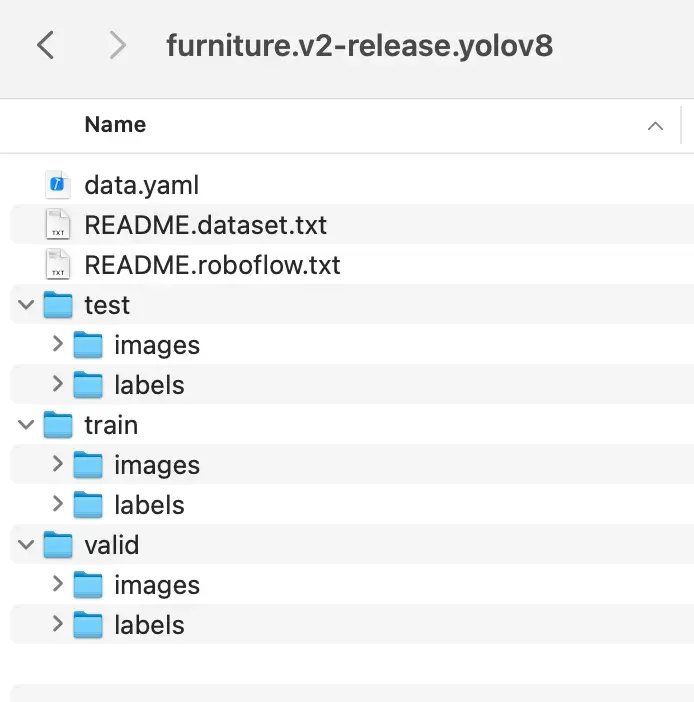
Inside, you’ll find a data.yaml file that describes the dataset. Here’s its content:
train: ../train/images
val: ../valid/images
test: ../test/images

nc: 3
names: ["Chair", "Sofa", "Table"]

roboflow:
  workspace: roboflow-100
  project: furniture-ngpea
  version: 2
  license: CC BY 4.0
  url: https://universe.roboflow.com/roboflow-100/furniture-ngpea/dataset/2
Here’s a brief explanation of the fields above:
train,val, andtestspecify the paths to the training, validation, and test images, respectively.We need to update these to the actual absolute paths on your computer, assuming they’re placed in the/Users/danieljia/datasetsfolder. Generally,valisn’t strictly necessary, buttrainandtestare essential, typically following an 8:2 ratio. This “data volume” refers to the number of images and the coordinates and type indices of the target objects (furniture) within those images.ncis the number of labeled object classes in the dataset—currently 3.namesis an array of the labeled object names.
As for the other subfolders, we can see that test, val, and train each contain two folders: one called images, which holds the corresponding training pictures, and another called labels, which contains some interesting content. Let’s take a look at one. For example, the image Chairs--1-_jpg.rf.7104107727daae1f8c000a66cf0dd7b1.jpg has a corresponding label file Chairs--1-_jpg.rf.7104107727daae1f8c000a66cf0dd7b1.txt with the following content:
0 0.49666666666666665 0.48333333333333334 0.46 0.9383333333333334
-
First, the
0in the data indicates the index position of the detected object in the["Chair", "Sofa", "Table"]array—in this case, 0 means “Chair.” -
Next, the four numbers that follow. Here’s a diagram to explain what they mean:
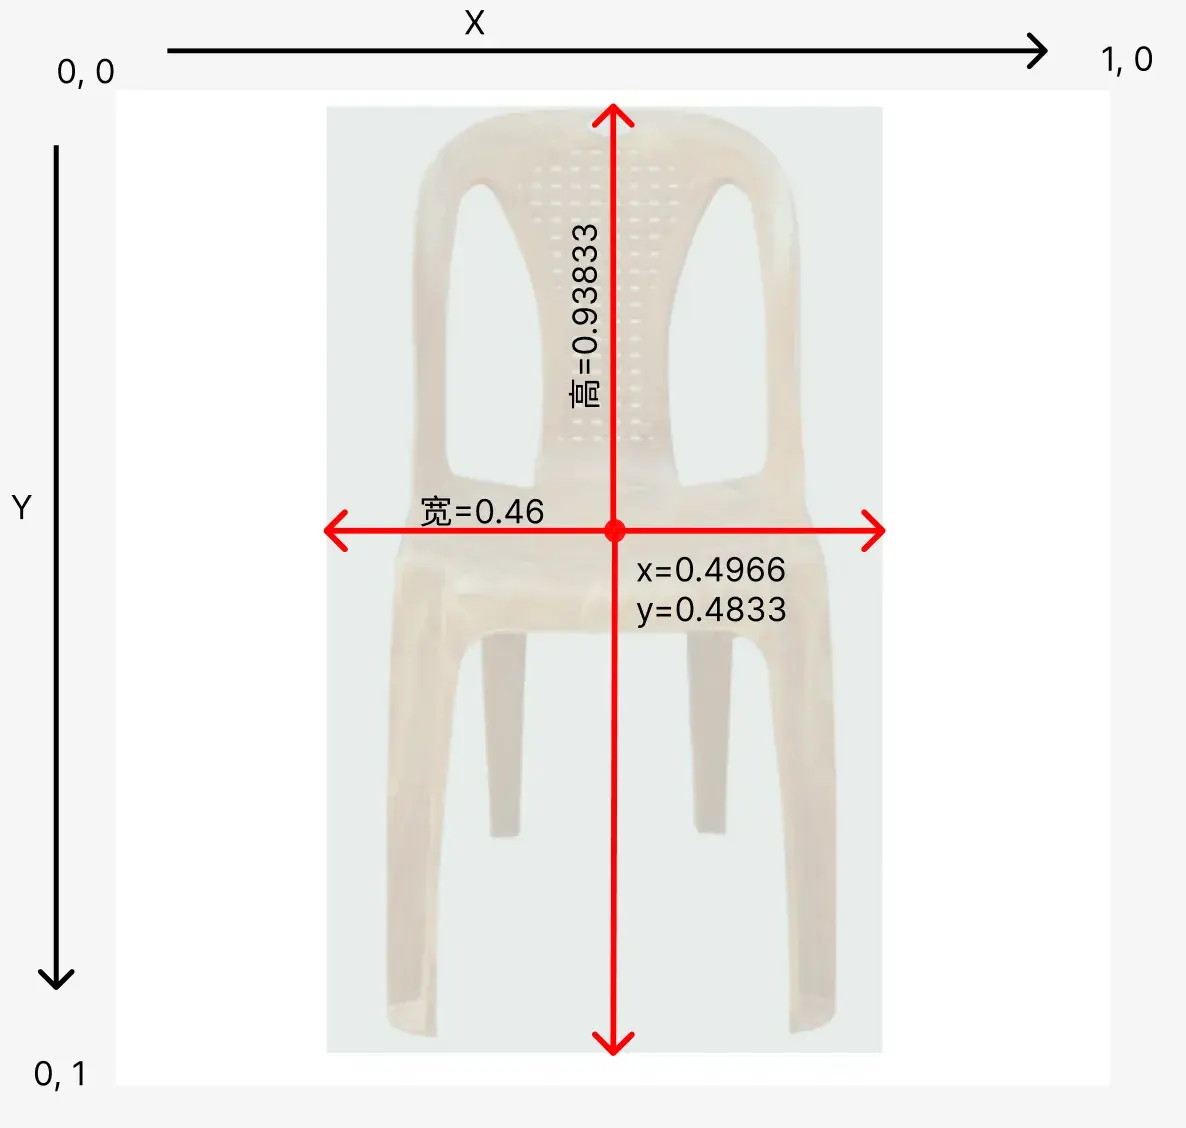
The top-left corner is the origin of the coordinate system, with X going right and Y going down. The first two numbers represent the center coordinates of the bounding box around the detected object, the third is the width of the bounding box, and the fourth is its height.Note that the image’s height and width are both 640px, so why are the coordinates all numbers between 0 and 1? This is because, regardless of the image size, the data structure uses 0-1 values to reduce computation and make the model independent of image dimensions. This approach has a standard name: Normalization.
How is normalization done? It’s simple. The center coordinates of the bounding box are (317, 309), and the image’s height and width are both 640px. So, you calculate (317/image width, 309/image height), which gives you the normalized coordinates (0.4966, 0.48333) from the data above.
Training
With the data preparation above, we’ve set up the data.yaml file and prepared the data. Now, let’s start training our own model.
Environment
Before training, let me list my training setup:
- Python: 3.11.4
- MacBook M2 Air
- ultralytics: 8.1.29
- PyTorch: 2.2
First, install the required Python libraries:
pip install -U ultralytics
pip install -U pytorch
How to Train
Here’s the code to train the model:
from ultralytics import YOLO

# If you’re using an NVIDIA GPU, you can use this code to check
device = "cuda" if torch.cuda.is_available() else "cpu"

# If you’re using an M-series chip MacBook, use this code. However, on my own computer, I found that MPS didn’t seem to work—it was slower than CPU.
# device = "mps" if torch.backends.mps.is_available() else "cpu"

# Load the pre-trained model
model = YOLO('yolov8n.pt')
# Train the model with custom data
results = model.train(data='/Users/danieljia/datasets/data.yaml', epochs=50, batch=16, imgsz=640, device=device)
Let’s break down the details below.
ultralyticslibrary currently uses the YOLOv8 version and supports exporting models for iOS use, which is convenient. However, pay attention to its License. This company/organization has many YOLO-related libraries with fast support for new features. You can check them out here.- As mentioned in the comments, when I trained on my M2 computer, it didn’t recognize my M-chip properly and was slower than CPU training—for reasons I don’t know. In that case, you can just set
device="cpu". cudarefers to NVIDIA’s GPU. If you have one, I recommend using it for training—it’s much faster.yolov8n.ptis a PyTorch file, commonly called a “weight” file, used here as our pre-trained model. What’s the point of a pre-trained model? Simply put, it already contains various tuned parameters. We just need to take new data plus these preset parameters, train them together, and get a new fine-tuned parameter file (a .pt file). Different datasets may require some fine-tuning for the best results, likely adjusting the neural network layer parameters.- Finally, let’s look at the parameters in
model.train.- data refers to the path of the data.yaml file we prepared in the previous section.
- imgsz is the size of the training images, typically square. Since our images are 640px, we set it to 640.
- Then there’s the
epochsparameter. This indicates how many times the entire dataset is passed through the model. Each pass adjusts the model. The ideal number depends on the situation—here it’s set to 50, but you can try 100. Larger numbers increase training time and may lead to overfitting (where the model fits the training data too well but performs poorly on test data). Too small a number might mean incomplete training, failing to capture the data’s true features, resulting in poor recognition. - batch means that, since the training data is large, each
epochspass splits the data into batches (here, 16), improving efficiency and reducing system strain. - There are other parameters too—check them out here.
Additionally, training generates validation metrics, which, along with the model file, are saved somewhere. I’ll write a separate post about these metrics once I’ve organized them.
Validation
With a GPU, training should take about 20 minutes. Once done, the model file remains in .pt format, and the save path will be shown in the training logs—let’s assume it’s saved to /Users/danieljia/yolo/best.pt.
Now, let’s validate it with an image.
from ultralytics import YOLO

# Load the trained model
model = YOLO('/Users/danieljia/yolo/best.pt')
results = model(['im1.jpg'])
results[0].show()
Summary
This article walked through training an object detection model using custom image data, explaining the steps and terminology. The next article will cover how to integrate it into an iOS SwiftUI project—stay tuned!
Also, if anything in the article isn’t clear or seems off, please leave feedback in the comments.
References
If you’re interested in PyTorch, I strongly recommend checking out Zero to Mastery’s 00 and 01 chapters. They’re easy to understand, include exercises (which I suggest doing), and explain ML concepts practically from an engineering perspective. They also clearly outline the workflow of machine learning with code examples. I recommend taking a look and, if you can, going through all the chapters and practicing hands-on!